

In the modern business landscape where data volume is growing rapidly, the ability to unlock its power in real-time is critical for businesses to adapt to market demand with immediate, data-driven insights. Confluent Cloud offers a fully managed cloud-native Apache Kafka service for building such event-driven applications and real-time data pipelines, enabling businesses to achieve unparalleled processing speeds and deliver exceptional customer experiences with the freshest data.
However, building applications to harness the power of streaming has historically come with significant developer complexity (e.g., novel concepts and protocols like ordering guarantees and WebSockets, as well as manual handling of incremental data and memory management inside streaming UIs). With Superblocks, developers can now build real-time applications on top of Confluent, without the streaming expertise.
In this tutorial, we'll demonstrate how easy it is to build a streaming application in Superblocks, by creating a vehicle logistics tracking application that connects to a Kafka cluster running on Confluent Cloud.
1. Set up Confluent Cloud
First, sign up for a free trial of Confluent Cloud if you don’t already have one. Follow the Quick Start for Confluent Cloud tutorial to create a basic Kafka cluster and topic (Steps 1 and 2 under Section 1). Here we’ve created a topic called “vehicle data” in a cluster called “product”.
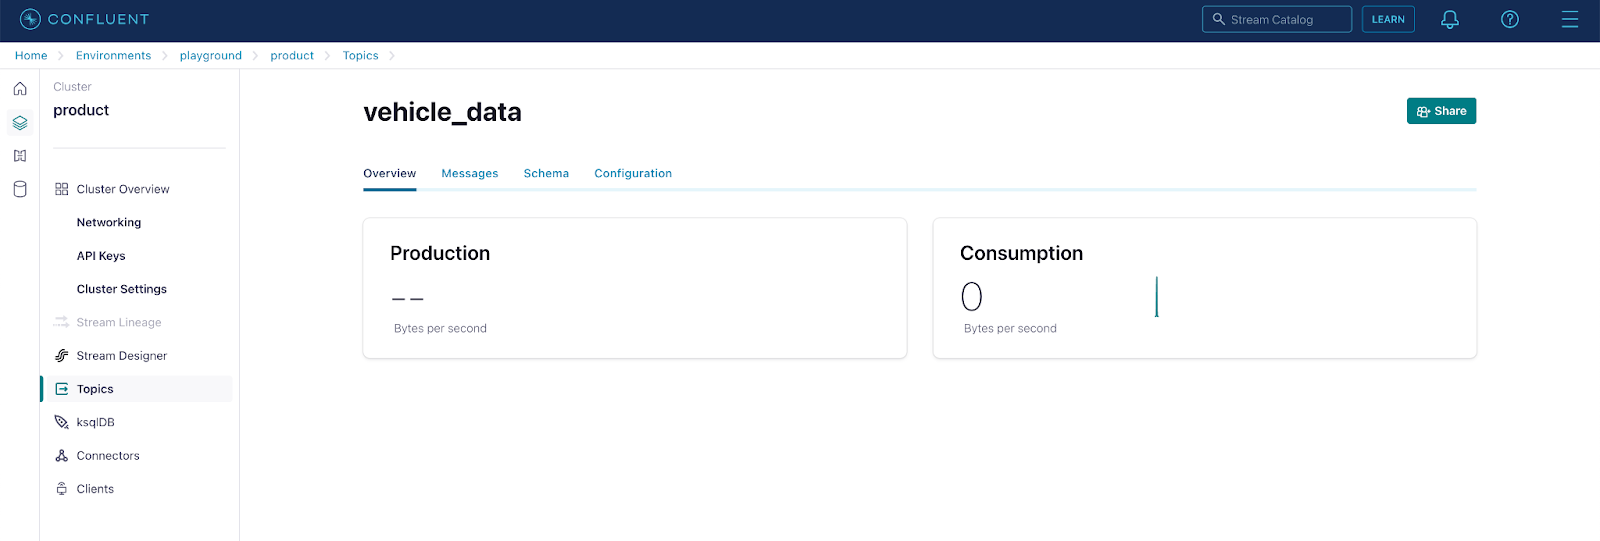
For this demo, we’ve also populated the topic already with some sample vehicle data indicating a vehicle’s id, location, and distance / time from its destination. An example value follows the format below:
Lastly, in the Confluent Cloud Cluster Overview page, note the following information:
- The cluster Bootstrap server found under Cluster Settings → General tab → Endpoints section
- The cluster API key and secret found under API Keys
We’ll use these values to configure the integration in Superblocks.
2. Set up Superblocks Confluent integration
In Superblocks, configure the Confluent integration with the following information:
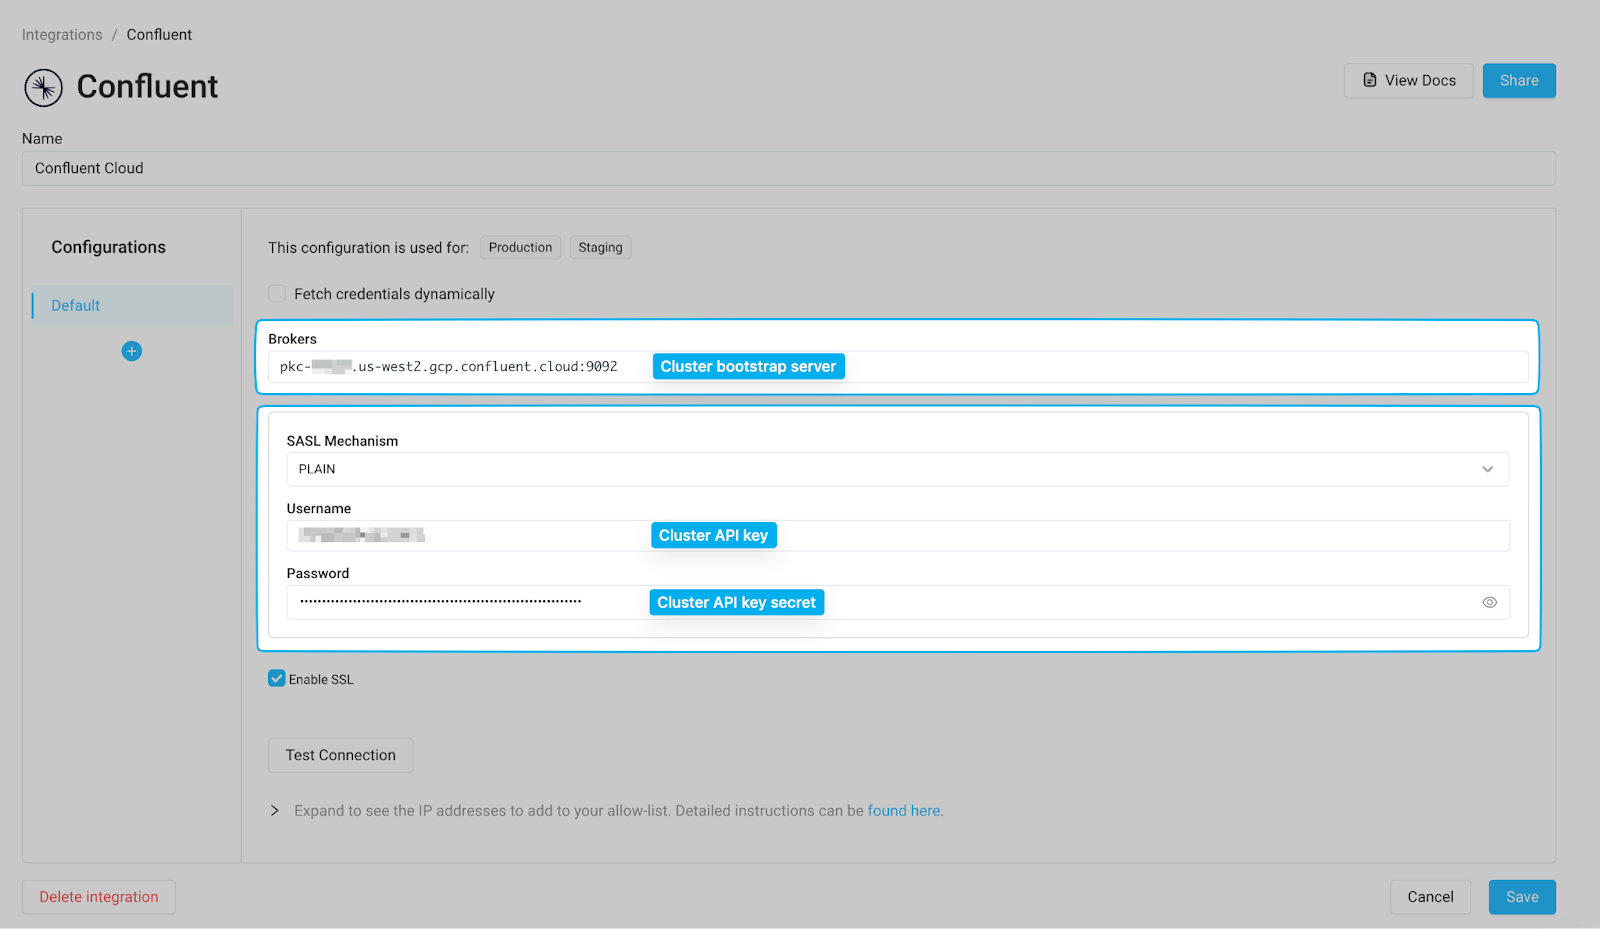
Click “Test Connection” to confirm that Superblocks can connect to your cluster, then save the integration.
3. Build the Superblocks Application
To get started building the application, navigate to the Superblocks home page, click Create New, and choose Application. Here, we've named the app "Logistics Tracking - Confluent Streaming App."

The application will consist of a backend and frontend with the following pieces:
Backend
- A streaming API that connects to Confluent and consumes / processes messages from the previously created topic
Frontend
- State variables and event handlers to store and update the application state with the data from the backend
- Components to display the data for the end user
Let's start by building the backend.
Backend streaming API
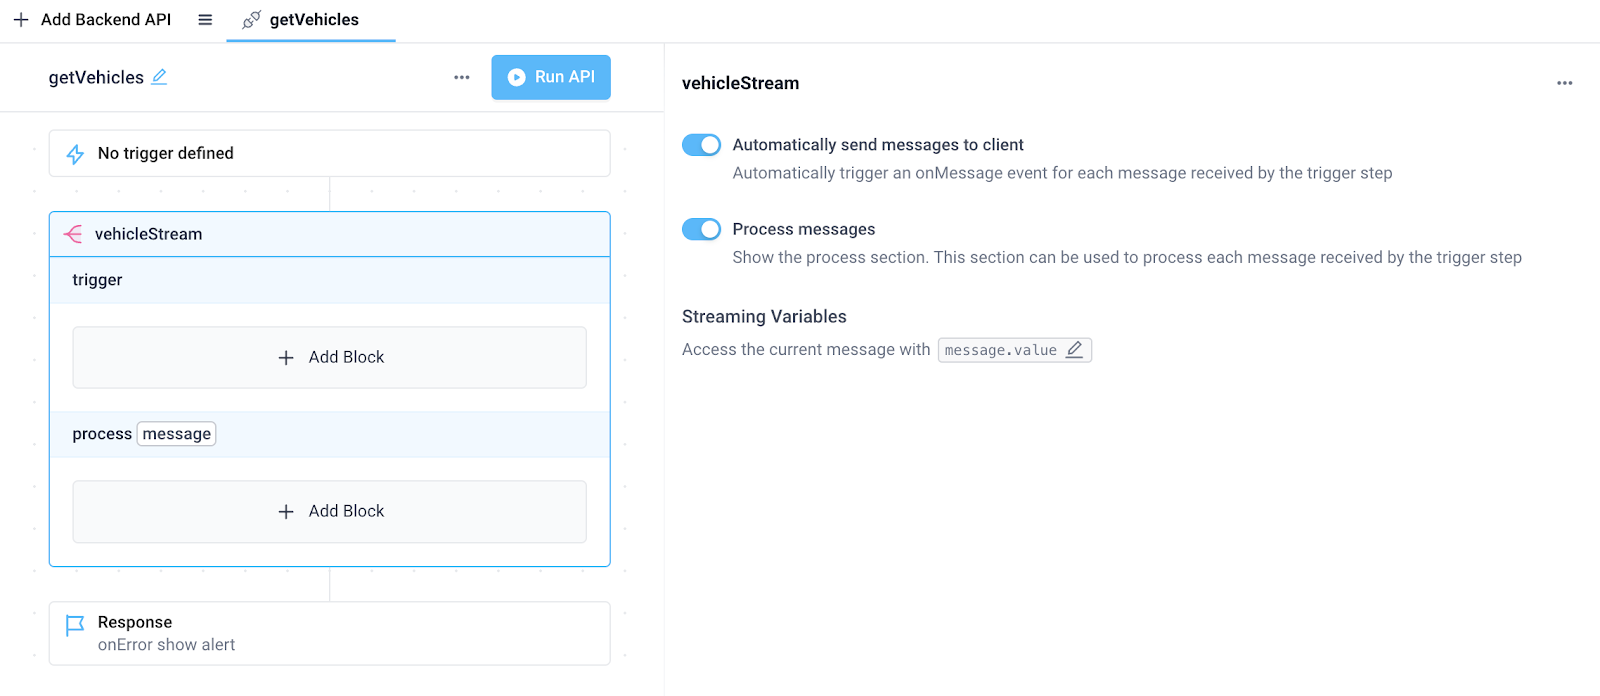
In the application API editor, create a backend API with a single Stream block. Here we've named the API getVehicles and the Stream block vehicleStream. The steps we’ll add to this Stream block under trigger and process will run on every message consumed from Confluent. Also, note the following Stream block settings:
- Automatically send messages to client (enabled by default) - This will automatically send each processed message from the backend stream block to the frontend, where we’ll configure event handlers in the next section.
- Process messages (enabled by toggling on) - This will allow us to add custom code to transform each message received from our Confluent integration.
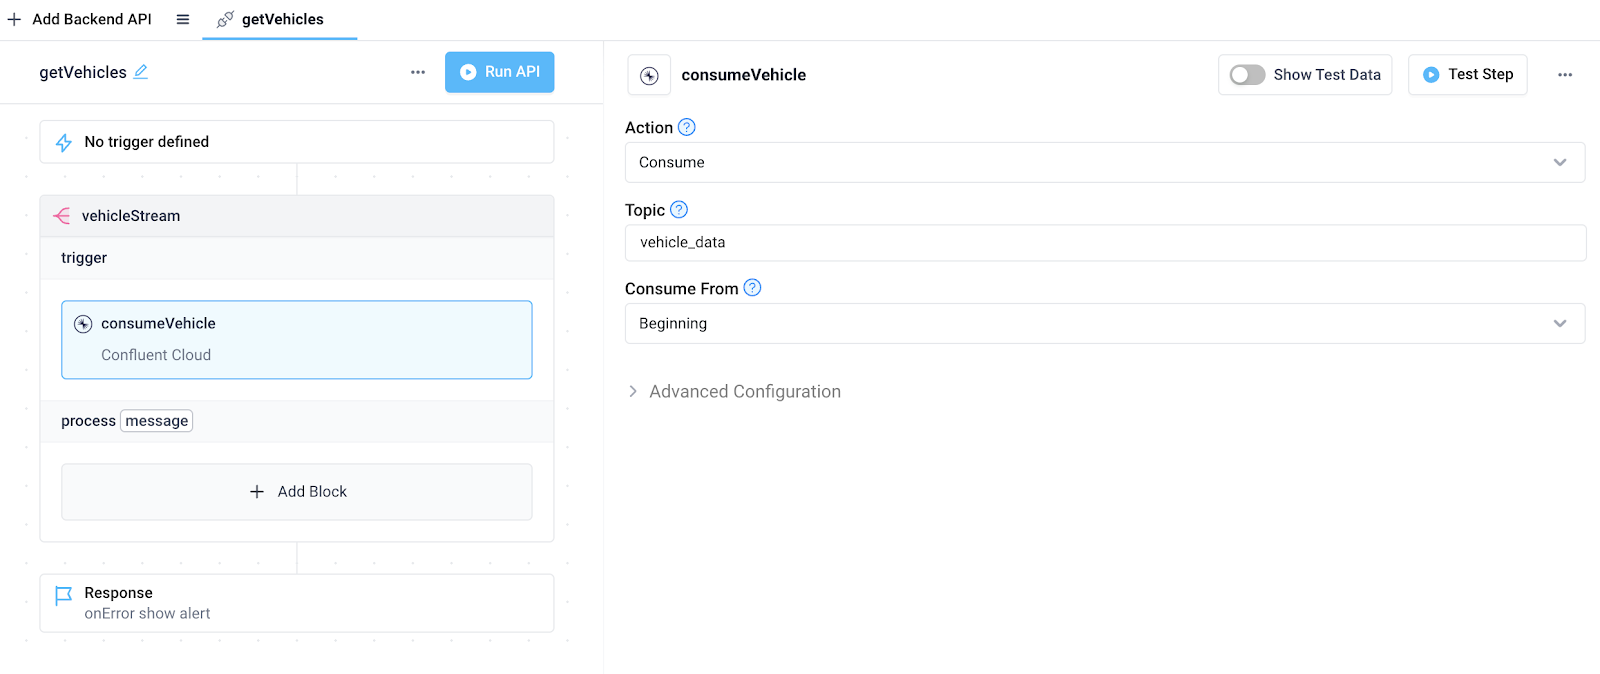
Next, add the previously created Confluent integration to the trigger section of the Stream block. Here, we've named the step consumeVehicle. Configure the integration step as follows:
- Set Action to "Consume"
- Set Topic to your topic name (Here, we're using our "vehicle_data" topic)
- Set Consume From to your desired consumer settings (For demo purposes, we'll consume messages from the beginning of the pre-populated topic)
Before we leverage these messages in the application, let's extract just the relevant data from the raw message, and transform that data. For our use case, we need only the vehicle data under the value key within the raw message object. Furthermore, we can also flatten the nested objects within that value so the data can be displayed neatly in the Superblocks Table component when we create the frontend. To accomplish both of these, add a JavaScript step to the process section of the Stream block with the following code.
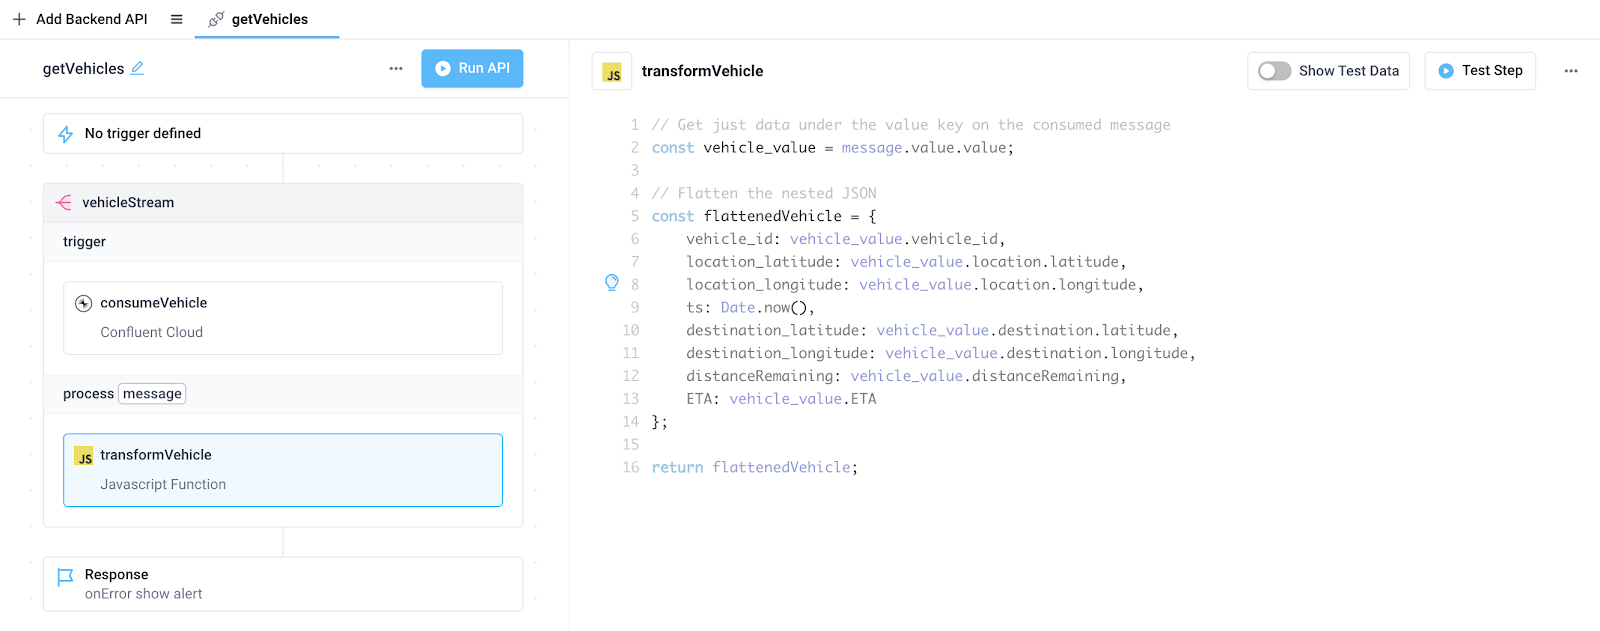
After test running the API, we see the data returned for each iteration of the stream is the desired flattened JSON object with that vehicle's information.

Frontend state variables and event handlers
Next, we need to update the frontend state with the data consumed from the backend API. To do so we can leverage State Variables along with the onMessage event handler.
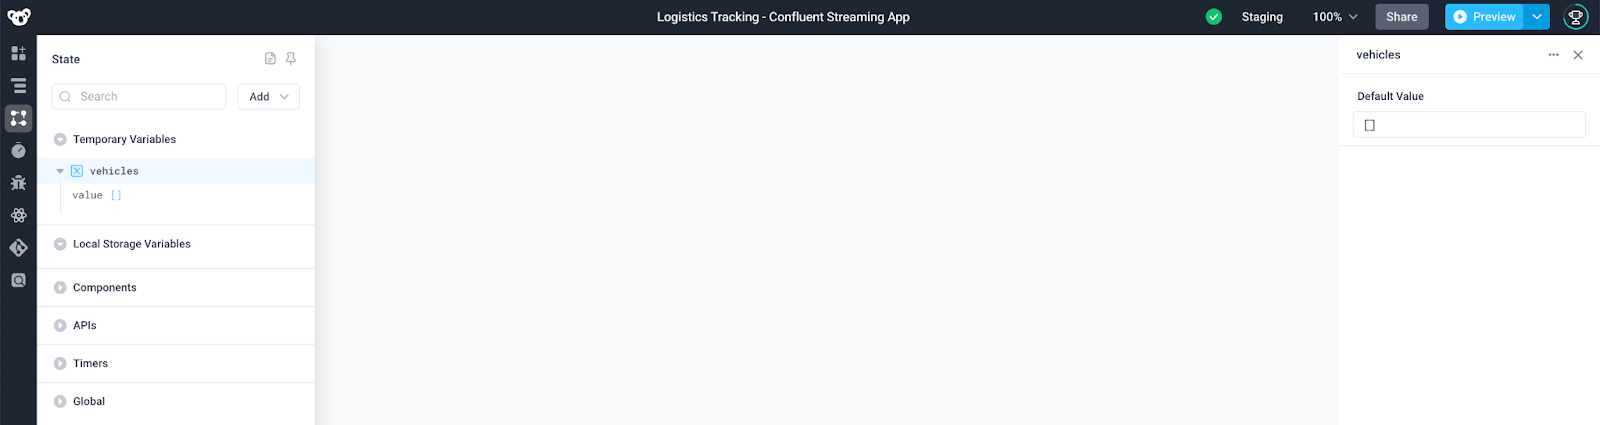
First, create a temporary state variable with a default value of an empty array. Here, we've named the variable vehicles.
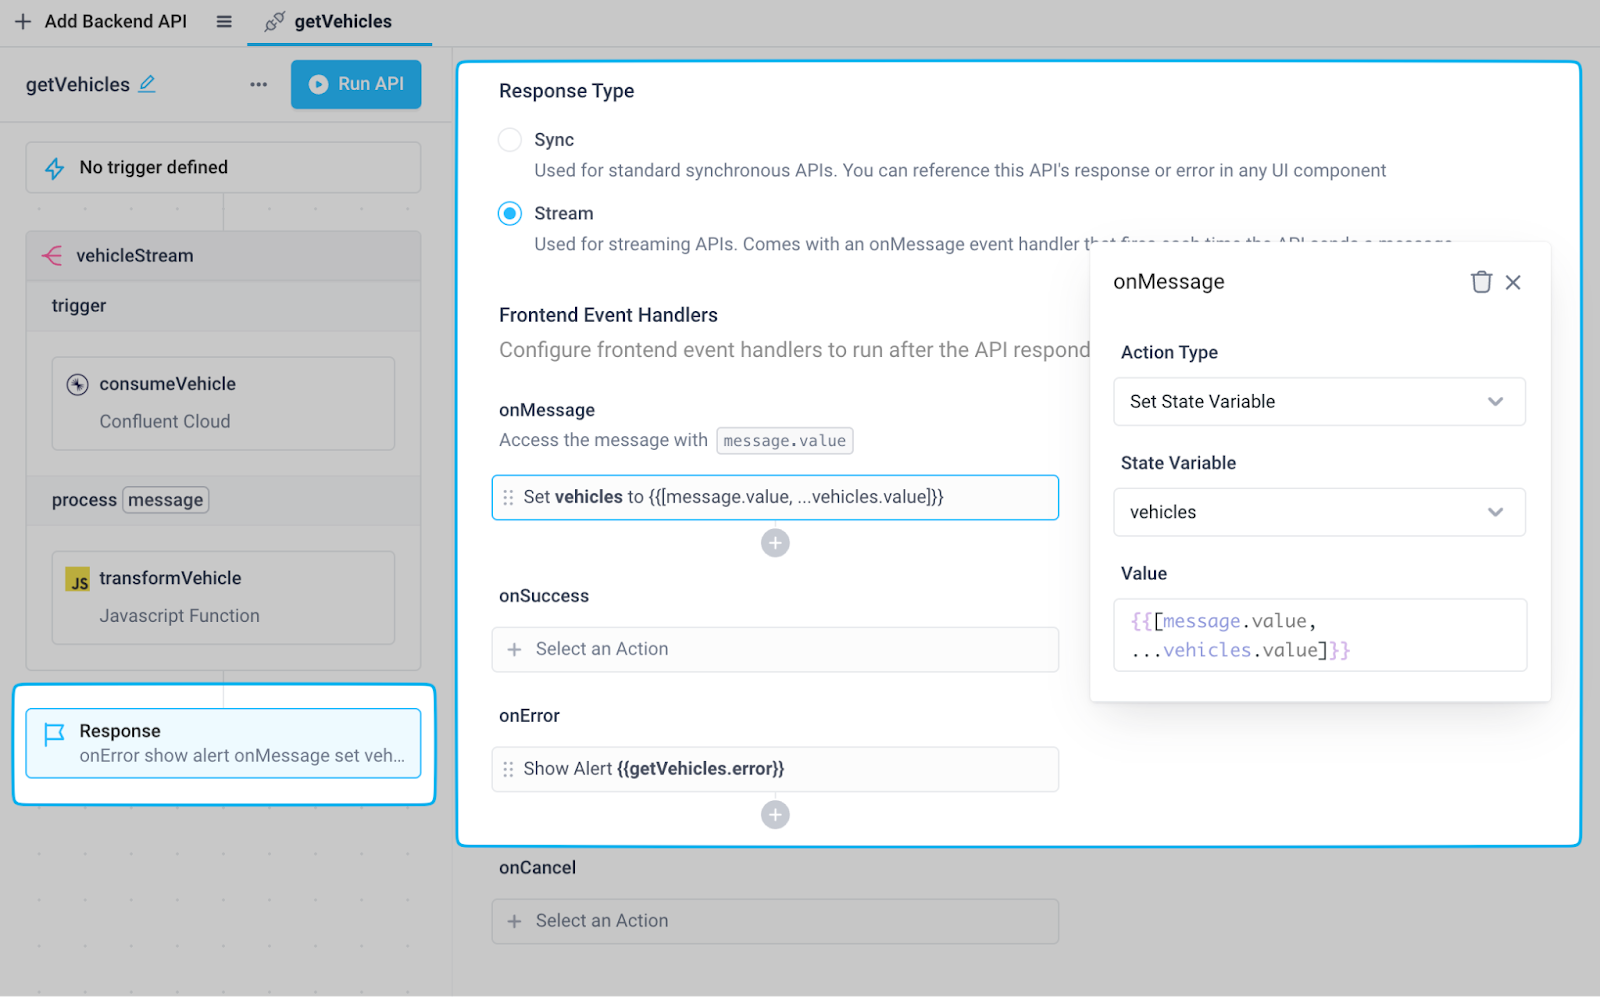
Next, configure the response block of the previously created getVehicles backend API in order to connect the backend data to the frontend state variable:
- Set Response type to "Stream"
- Add an onMessage event handler that sets the vehicles state variable with the Set State Variable action. Here we've set the state variable to an array of objects by prepending the transformed message returned from the stream block (accessible through message.value) to the latest value of the state variable using JavaScript spread syntax:
Frontend components
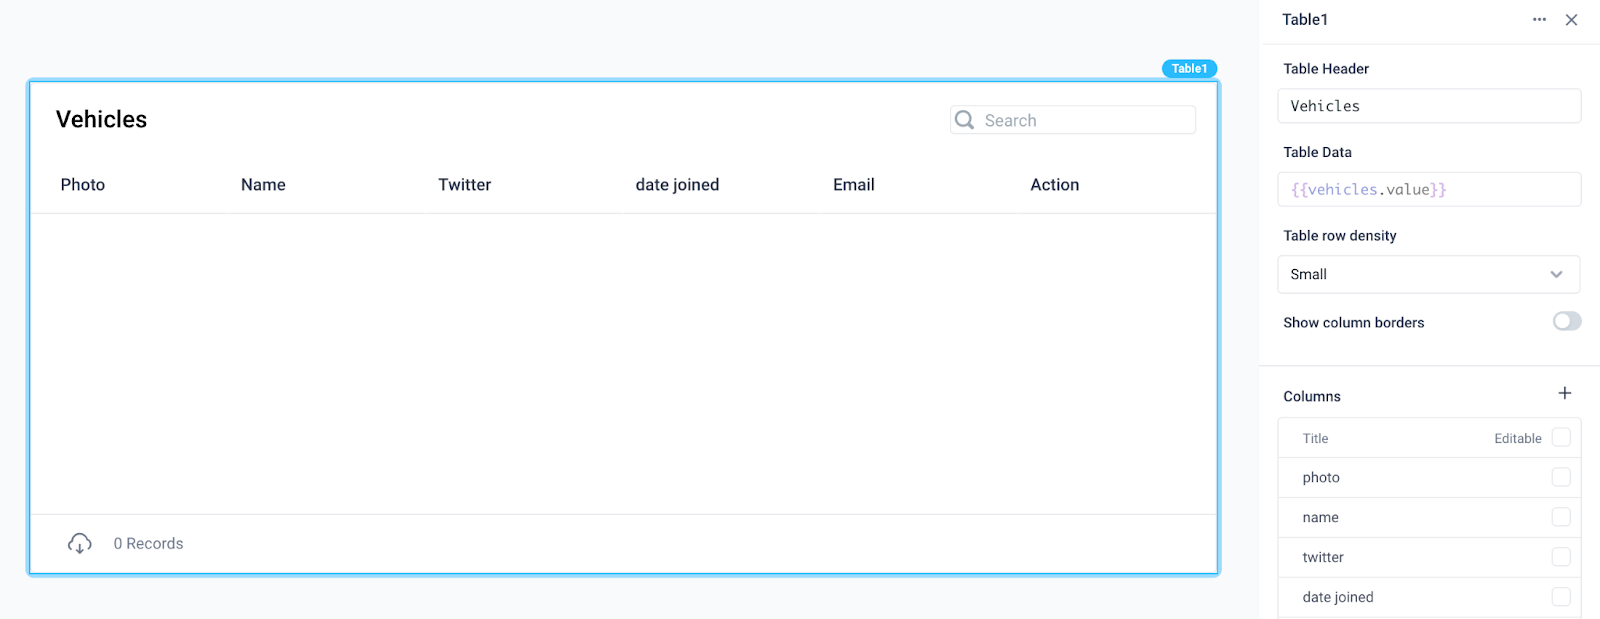
Lastly, we need to display the vehicle data in a frontend component for end users of the application. To do so, drag a Table component onto the canvas and set its Table Data property to the value of the state variable, {{vehicles.value}}. Note, the column names here are still showing the names from the default Superblocks Table dataset, but will update once we run the API for getting the vehicles.
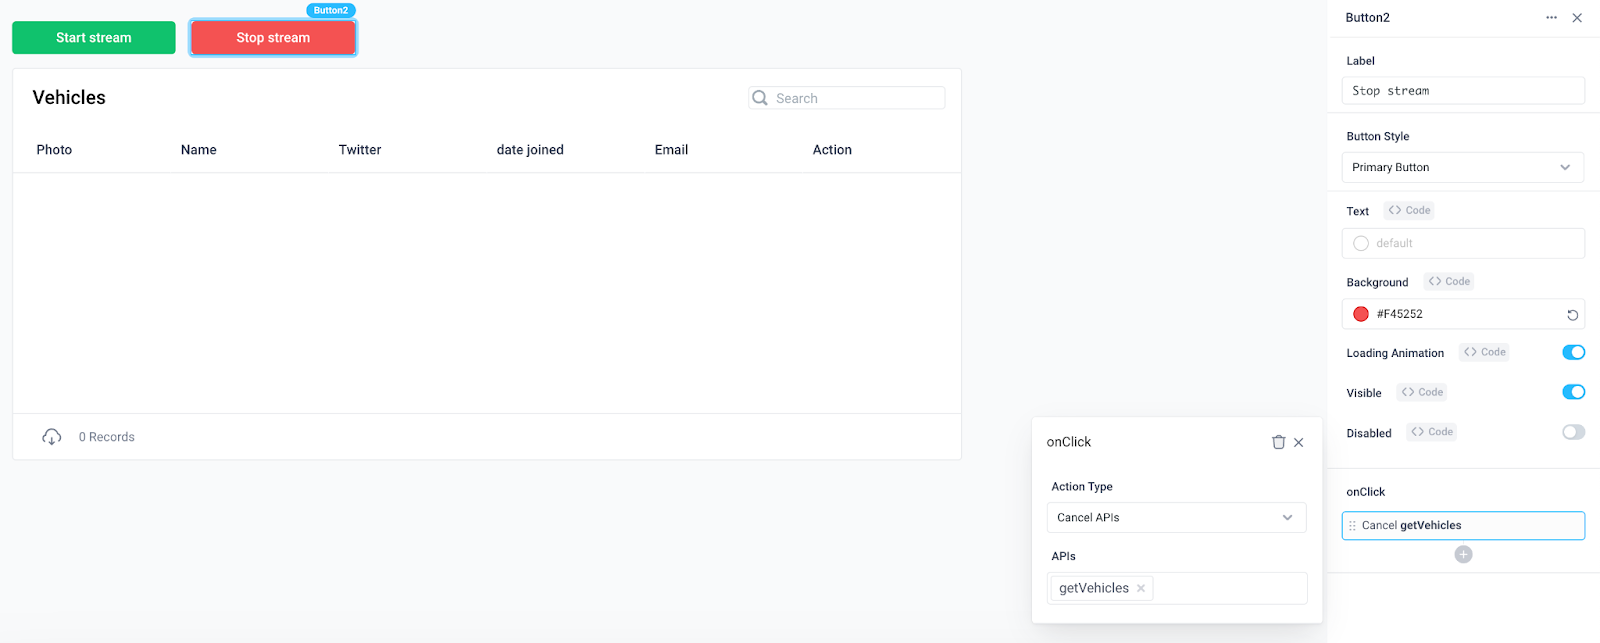
To control the stream of vehicles, add two button components that start and stop the stream using the Run APIs and Cancel APIs action types for the button’s onClick event handler.

Clicking “Start stream” now kicks off the getVehicles backend API, which consumes messages from Confluent, then updates our frontend state variable for each message, resulting in a live stream of vehicles in the table.
4. Expand the application with a live map
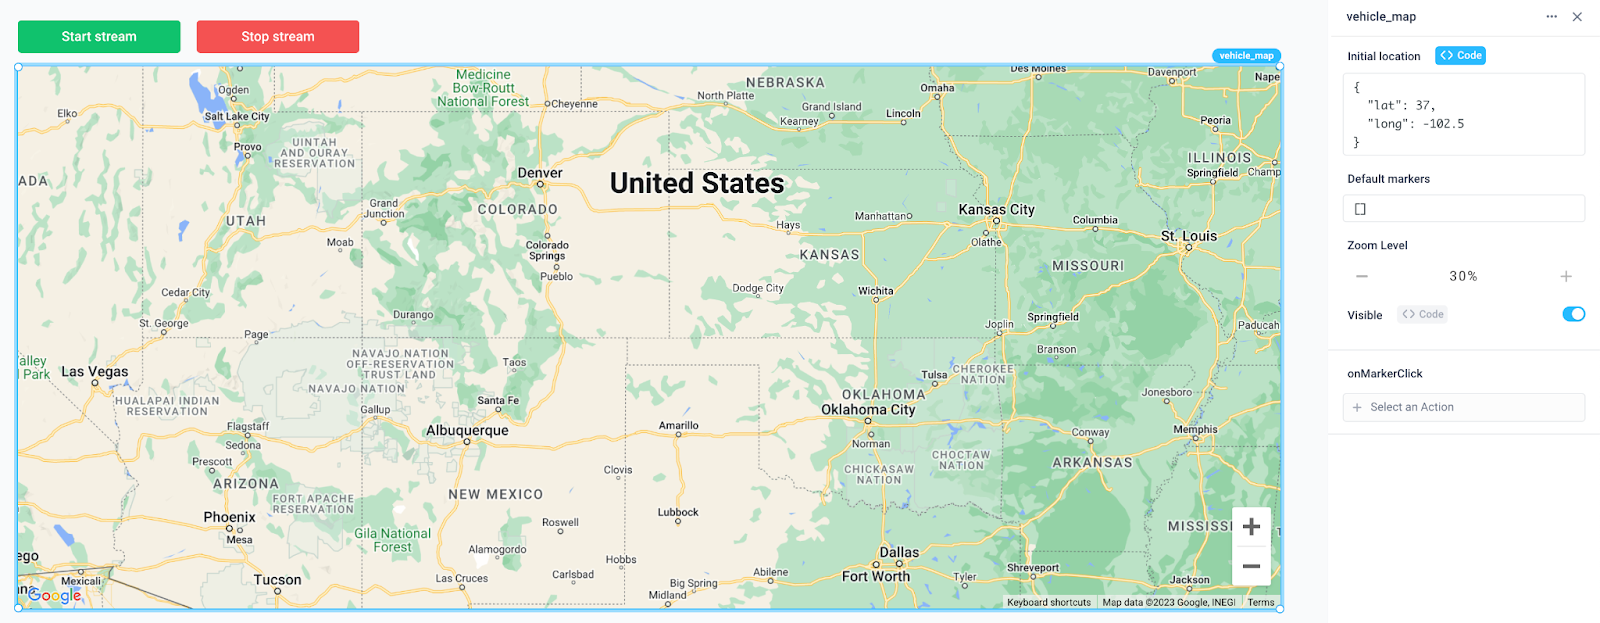
To track each vehicle’s location, it will be most useful to see the data in the context of a live map. Here we’ve added a Map component named “vehicle_map” with an initial location and empty list of default markers.
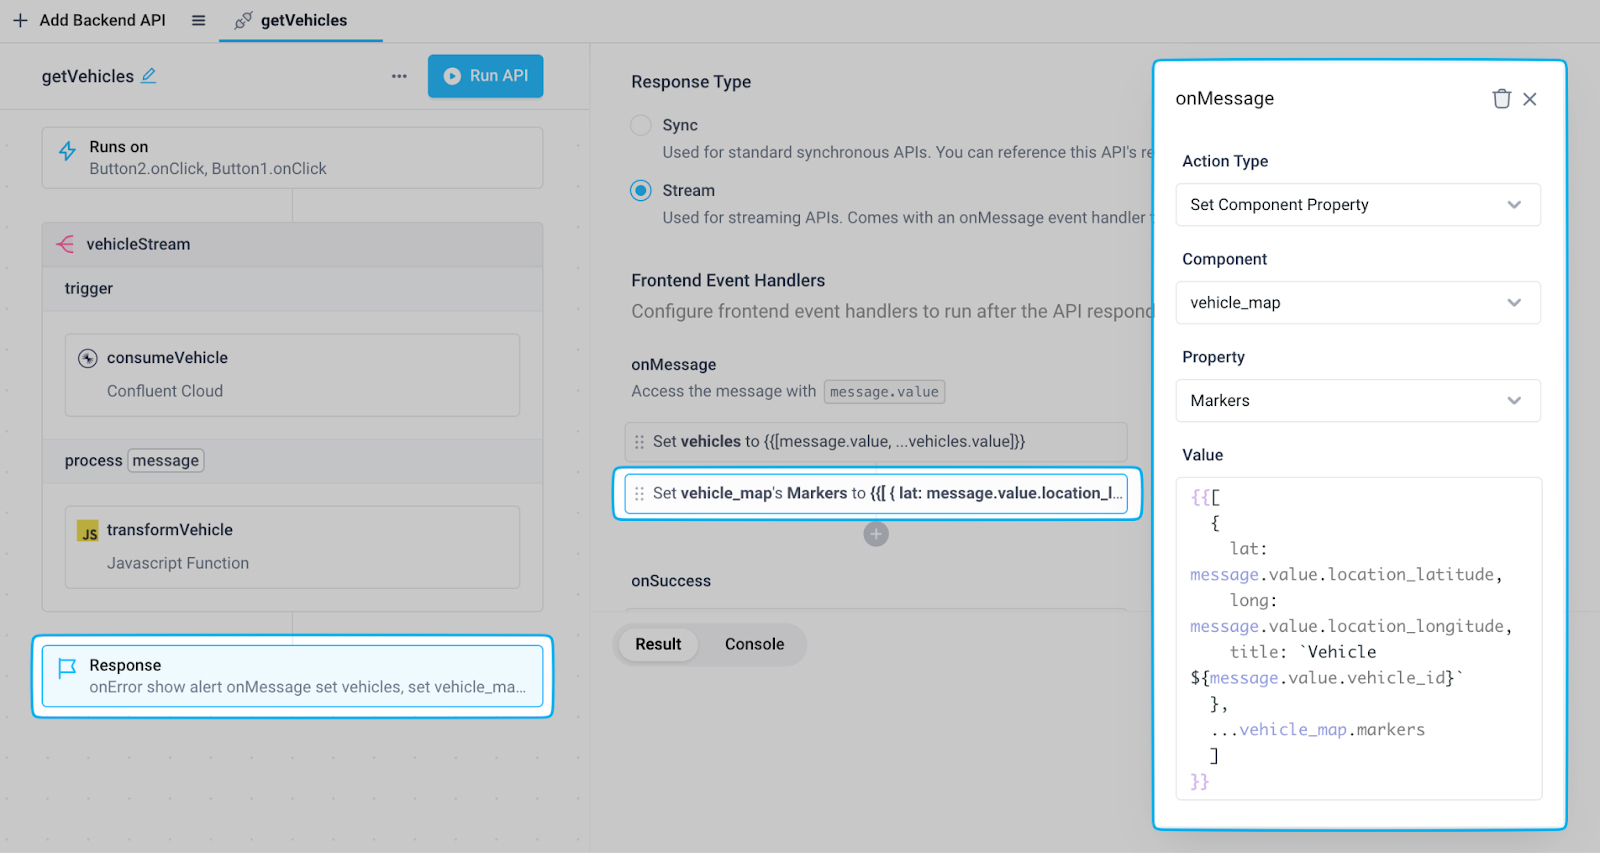
To update the markers based on the messages consumed from the backend getVehicles API, add another onMessage event handler that uses the Set Component Property action type on the map component’s “Markers” property. Similar to the state variable configured previously, we’re using JavaScript spread syntax to add the current message’s location data as a marker to the front of the existing list of markers.
Now when we run the API, the app updates in real-time to display the details of each vehicle in the table as well as the vehicle’s location on the map. Anytime a vehicle’s location is updated based on a message produced to the Kafka topic, the map will reflect this as well, allowing end users to track the location of each vehicle live.
Summary
With Confluent Cloud, businesses can reap all the benefits of Kafka for streaming data, augmented with a fully managed, cloud-native experience. Together with Superblocks, developers can seamlessly connect to Confluent and build internal tools without streaming expertise, to operationalize streaming data more efficiently and surface real-time insights to business users.


Stay tuned for updates
Get the latest Superblocks news and internal tooling market insights.
You've successfully signed up
Table of Contents
%20(1).png)
Multiple authors
April 21, 2025
Operations Automation: What It Is & How to Get Started
Operations automation helps teams scale effectively. Learn what it is, why it matters, and how to implement it.
%20(1).png)
.png)
